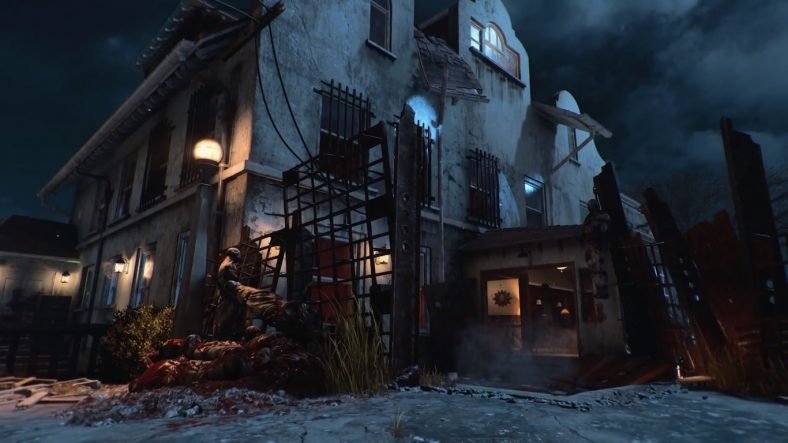
In this Call of Duty Black Ops 4 Zombies Blood of the Dead Guide, we will guide you on different important tasks that you will need to perform in the Blood of the Dead map which will unlock many important features for you. Blood of the Dead is one of the maps included in the Zombies mode in Black Ops 4 which is based on a large prison complex
We have curated this Call of Duty Black Ops 4 Zombies Blood of the Dead Guide for you in which we have detailed the complete walkthrough of important tasks such as finding Acid Gat Parts, Spectral Shield Part Locations, getting the Hell’s Retriever and activating the Pack-a-Punch machine.
Blood of the Dead Guide – Call of Duty Black Ops 4 Zombies
Our Call of Duty Black Ops 4 Zombies Blood of the Dead Guide details everything that you need to know about the Blood of the Dead map in Zombies mode of Call of Duty Black Ops 4.
Turning the Power On
The very step of this map is to turn the power on so you can have access to the complete map. Without turning the power on, you cannot have access to the complete map or build the much needed Spectral Shield for this map. To start off, you should know that there are two power switches that you must use to turn on the power in the map.
The first one is located in the Power House while the second one is located in the Building 64. To get to the Power House, leave the Richthofen’s lab and get to Model Industries. From there, head to West Grounds which will give you access to the Power House.
For the second power switch, head to the catwalk and enter the Recreation Yard. Get access to Cell Block Entrance and make your way through D-Block, C-D Street and Cell Block third floor to get access to Michigan Avenue. From there, head to the Citadel, enter the Citadel Tunnels, reach the China Alley and enter the Building 64 where the next power switch is located.
Turn it on and the power will be restored to the complete map giving you complete access and spawning ‘The Warden’. Kill it and you will get the ‘Warden’s Key’ which is used to build the Spectral Shield.
Building the Spectral Shield
Building the Spectral Shield is a very important task in the Blood of the Dead map. It will unlock many other features for the map so we recommend that you keep this task a priority for this map. This shield will help you block enemy attacks as well as collect the souls of zombies which you can unleash later in the form of a big shockwave.
It will help you block attacks both from the front and the back. When you are holding the shield, it will help you block the attacks coming from the front while if you are not using the shield and it is on your back, it will help you block attacks from the back as well. Although the shield is not invincible, it will break after certain hits and you will need to build it again by heading to a workshop.
Coming to its second task, the Spectral Shield will also help you to collect souls of the zombies whether in human or dog form. To charge the shield, you can zap zombies and collect their souls at the same time. This can be done by pressing the L1+R1 or LB+RB buttons to use a special zapper which will damage the enemies and collect their souls at the same time as well.
Charging the shield will allow you to build a massive charge shot called Spirit Blast. This blast is used to charging up the meter for Punch-a-Pack machine as well so it will come in handy later on in the map.
To build the shield, you will first need to find three parts for it. These are Shield Plate, Flaming Blue Orb and Warden’s Electric Key. We have detailed their spawn locations below.
Warden’s Electric Key
This is the main item in the shield will collects zombie essence and charges up the shield. To obtain this item, when you encounter Brutus, kill him. Killing Brutus will automatically give you this item. It cannot be found anywhere else on the map.
Shield Plate
The Shield Plate is found around the Citadel Tunnel. You can check out the following locations for it.
- In the Citadel Tunnels, it will either spawn halfway up the staircase or downstairs before the staircase door.
- Head to the China Alley where you will find it against a wall war before a staircase door.
Flaming Blue Orb
You will find the Flaming Blue Orb on a red fuse box. There are three located around the map which you can check for it to spawn there.
- There is a red fuse box located inside the main prison in Times Square.
- Another fuse box is located in the library of the main prison.
- You will find another fuse box in the Michigan Avenue located near the Warden’s office.
Once you have found all three components of the shield, head to the workbench to create the shield and equip it. Now you can activate the Pack-a-Punch machine or start your Easter egg hunt for this map.
Activate Pack-a-Punch Machine
Just like all other maps, Blood of the Dead also comes with a Pack-a-Punch machine which you must activate first. Without this machine activated, you will not be able to upgrade your weapons so it is vital that you activate it as soon as possible.
The first step in getting to the Pack-a-Punch Machine is to build the Spectral Shield. Without building the Spectral Shield, you will not be able to activate the Pack-a-Punch machine. To do so, first activate the Spectral shield as explained above. Once you have the Spectral Shield up and running, you can start with the process to activate the Pack-a-Punch machine.
Once the shield is ready, equip the shield and you can start using it for the next phase. Now you need to collect zombie souls to charge it up. To do so, you can zap the zombies or dogs whatever comes to attack you by draining their essence. Keep at it until you get the notification about it being ready.
Once the shield is all charged up, you must open the rooftop. To head to the rooftop, you will need to cover a great deal of the map. Start from the West Grounds, use the Catwalk to reach the Recreation Yard. From there, head to the Cell Block Entrance and enter Times Square. From there, make your way to the Infirmary via Cafeteria and go to the upper floor of the Infirmary. Here you can access the Rooftop.
When you see the electric chairs at the back of the rooftop, you must electrify them. Find the meter of the chairs which represent their charge, equip the shield once more and shoot a Spirit Charge on this meter. If you have done this correctly, then the Punch-a-Pack machine will land where the chairs were located.
That is all for activating the Punch-a-Pack machine. Now you can use it anytime you want to upgrade your weapons.
Acid Gat Wonder Weapon
Acid Gat is a returning weapon from Black Ops 2 and players will find it in the Blood of the Dead map in the Zombies mode. This is very lethal weapon which shoots acid pelts that stick to any surface and explode after sometime. This makes is useful for crowd control and other strategic tactics.
Its magazine holds 30 bullets but you will to fire and reload the gun. You will need a little practice to time it right as the explosions take some time to explode so if you are firing at an approaching group of enemies, time your shot right to make the most out of a single shot.
You can get the Acid Gat by upgrading the Blundergat to an Acid Gat. For doing so, you will need to find three parts scattered around the map first. After you have collected all the parts, you can easily upgrade the Blundergat into the Acid Gat. We have detailed the locations of all part below.
Case
To find the case, head to the Transverse Tunnel which is located right after you leave the New Industries building. Look for it under the wall weapon inside the tunnel.
Acid Bottle
Acid Bottle is located inside the Infirmary. You can check around the following locations to find it.
- Check the table located in the narrow corridor
- Check the locked cabinet in the backside of the infirmary
- Check the table near the baths
Motor
You will find the Motor near the Warden’s office. It is located beyond Michigan Avenue. Check the following locations for it.
- Unlock and access the small office next to Sally Port room.
- Check the floor near the mystery box in the corner
- Check the table inside Warden’s Office
Once you have acquired all the required parts, simply head to an empty workbench and assemble it. You will assemble the Acid Gat kit first and then use the Blundergat on it to complete the upgrade. Happy hunting.
Getting the Magma Gat
Another variation of the Blundergat upgrade is the Magma Gat which is basically a fiery version of the Acid Gat and once fired, zombies are attracted to the spot where you fired your weapon leading to an exploding death. To get this variant, you must first find a Blundergat and then make your way to the Warden’s House. Inside the Warden’s House, you will see a fireplace where you can place your weapon.
Interact with it and put your Blundergat in it. Once done, the whole house will be locked down and zombies will start swarming to your location. Now you must kill and charge until the charging is complete. Blue skulls will appear over the fireplace as you kill more zombies. Keep at it until all three skulls appear and the gun is fully charged.
Once it happens, pick up the gun and quickly run back to the spawn point of the map right at the beginning. The gun’s charge will deplete so you will need to keep it charged. You will find many blue fire barrels along the way on your way back. Go to them to keep the blue flames on your weapons alive.
Once you are at the spawn location, place the gun inside the machine here to make the final upgrade process complete and you will get a permanently upgraded Magma Gat for use in the game.
Getting the Hell’s Retriever Weapon (Easter Egg)
Another awesome weapon found in Blood of the Dead map is the Hell’s Retriever. This weapon has the ability to cut through zombies and bounce back to hit more enemies before returning back to your hand. This is very useful in tight areas or if you are left with no area to run with zombies surrounding you.
To get the weapon, you must first head to three different locations and feed some dogs. These are not normal zombie dogs but special dog heads which will appear when you kill a zombie near them. These are marked locations and you must stick close to these dog heads while killing the zombies so they can eat the zombies. Keep in mind that the dogs will eat one zombie at a time so wait until it is done with its previous bite before killing another one.
The first dog head is located in the New Industries room. This is near the start of the game. Exit Richthofen’s Lab and go upstairs to enter this room. You will find the dog’s head in the corner. Look behind some boxes for a red marker on the map.
For the second dog head, you must complete a good deal of the map until you have access to Cell Block 2nd Floor. This is where you will find the second dog’s head. This is between two cell blocks and right after the Recreational Yard after crossing C-D Street.
The third dog’s head is located at the Eagle’s Plaza. Leave the Warden’s Room and you will come to a house. The dog’s head is on its wall. You will need to feed at least 10 zombies to each head. Once all three dogs are fed, you can collect Hell’s Retriever.
To get your weapon, head to the Citadel where you will come to a wall where three dog heads are present. Check the floor which will be destroyed giving you access to a lava tunnel beneath it. To get the weapon, you must use a Fast Travel tunnel to get it. To use a Fast Travel gate, you will be required to pay 500 points.
The best way to get it is to travel from the Showers to Warden’s House or Warden’s House to Showers. Make sure that you are facing the weapon and press the button quickly to pick it up. It might take a few tries to get the timing right. Once you have the weapon, you can start cutting up zombies in half.
For more Cal of Duty: Black Ops 4 Zombies guides, check out our Voyage of Despair Map Guide , IX Map Guide, Classified Map Guide and Zombies Perks Guide.
This concludes our Call of Duty Black Ops 4 Zombies Blood of the Dead Guide. If you want to add anything to this guide, feel free to use the comments section below.


