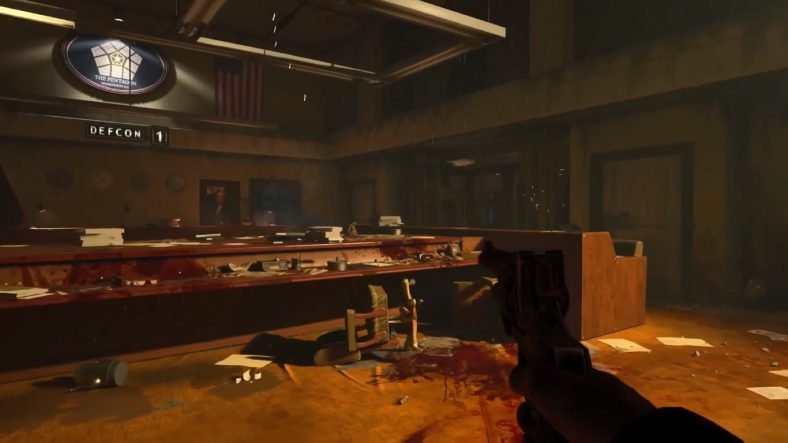
In this Call of Duty Black Ops 4 Zombies Classified Map Guide, we will guide you on different important tasks that you will need to perform in the Classified map which will unlock many important features for you. Classified is one of the maps included in the Zombies mode in Black Ops 4 which is one of the maps locked behind the Black Ops Pass.
We have curated this Call of Duty Black Ops 4 Zombies Classified Guide for you in which we have detailed the complete walkthrough of important tasks such as finding and building the Shield, activating the Pack-a-Punch machine and the main Easter Egg found on this map.
Classified Map Guide – Call of Duty Black Ops 4 Zombies
Our Call of Duty Black Ops 4 Zombies Classified Map Guide, details everything that you need to know about the map and how to complete some important tasks such as activating the Pack-a-Punch machine, finding the wonder weapon and building the shield.
Turning On the Power
The first step for this map is to turn on the power so that you easily move around the map and use the many teleporters located here. To do so, from your spawn location, use the lift and go down to the War Room. Here, use another lift to access the Laboratories below here. The power switch is located here.
In the Laboratories, go to the second room located on the left side. Inside you will find the power switch. Interact with it to activate it and this will turn on the power to the entire map. All teleporters will now be functional and you will be able to teleport to other areas of the map.
Activating the Pack-a-Punch Machine
After you have activated the power, you can now work towards activating the Pack-a-Punch machine of this map. To access the machine, you must find three parts scattered around the map which will allow you to teleport to the Pack-a-Punch machine. These parts are Lid, Wiring and Cover.
Lid
The Lid is located in the Panic Room which can only be accessed once DEFCON 5 Protocol has been activated. To do that, you will need to flip four DEFCON 4 switches which will allow the teleporter to teleport you to the Panic Room. These four switches are found in the locations below.
- Switch # 1: Located in the Server Room. It is on the lower level of the War Room.
- Switch # 2: Located on the main floor of the lower level of the War Room.
- Switch # 3: Located on the upper level of War Room. Exit the lift and look on the left side.
- Switch # 4: Located on the upper level of War Room. Look for it near the Spitfire buy location.
Hit all of these switches to activate the DEFCON 5 Protocol and head to the teleporter. You can now access the Panic Room. Once there, as soon as the wall opens up in front of you, go in and you will get the Lid.
Cover
To find the Cover, you will need to look in three possible spawn locations in the Main Offices. We have detailed the spawn locations below.
- In the middle of the room on a knocked over table
- Next to a table and chair near the Soda perk machine
- Next to a table in the smaller area where the floor and a broken door is covered in blood.
Wiring
For the Wiring, you will need to head to the Morgue next to the Laboratories. Check the below spawn locations for it.
- The office desk in the corner next to a half closed counter and a broken glass door. In the direction of the body’s feet lying in the middle of the room.
- Head to the small room inside the Morgue which has half a counter closed and look for it next to the Mystery Box.
- Check the giant cylindrical things on the left side of the body.
Once you have found all three parts, now you must find a workbench and assemble the Teleporter Signal Amplifier. One of the workbench locations is the Central Filling chamber. Look for it on the right side of the door leading to the main Offices.
The second workbench is located in the Weapon Testing chamber. Go to anyone of these and assemble the Teleporter Signal Amplifier. Once it is done, you can now head to the main teleporter and use it to access the Groom Lake where the Pack-a-Punch machine is present. Keep in mind that DEFCON 5 must be activated every time to access this place.
Building the Riot Shield
Your best defense against the zombies in the Classified map is the Riot Shield. Before you build the Riot Shield, you will need to find three parts for it. These three parts are Handle, Shield and Visor.
Visor
You will find the Visor in the following three possible spawn locations. Head to the Laboratories and look for it in the following locations.
- Check the floor of the room where you activate the power
- Next to the entrance door of the Weapon Testing area before Teleporter 3
- Before the Teleporter 2, look for a body lying on the floor. The visor is right next to it.
Shield
For the shield itself, you must head to the War Room Lower Level and look at the following possible spawn locations.
- Look for it in the room with the circular map in the middle.
- In the same room, go to the stairs and look for it in the right corner behind a pillar under the sign on the wall.
- Check under the stairs on the left side of the room.
Handle
For the handle, you must go to the Central Filing area and check the following spawn locations.
- In the main room, in front of the grey cabinets.
- Check the left side of the door leading to Main Offices. It could be lying there in the middle of two broken glass doors near some turned over grey cabinets.
- Enter the room and turn left to find it underneath a counter up ahead next to some cabinets.
Now that you have all the shield parts, head to any of the crafting locations and build the shield.
Finding Winter’s Howl
Just like other maps of the Zombies mode, classified also comes with its own Wonder Weapon, the Winter’s Howl. This awesome weapon allows you to freeze zombies dead in their tracks for you to break them by running in them or using another weapon. To find this awesome weapon, all you need to do is head to the Mystery Box and keep spinning it to obtain Winter’s Howl.
You can even upgrade it after obtain it at the Pack-a-Punch machine. Another way of getting your hands on Winter’s Howl is by pursuing the hidden Easter egg in the game.
Getting the Project Skadi Prototype (Easter Egg)
To find the Easter Egg of the map, head to the Main Offices and look for the closed window located between the Brew perk machine and Escargot wall buying location. Each time you interact with the wall, someone will talk with you for some time. On the 5th knock, Samantha will talk instead of the man and some Nova 6 gas crawlers will spawn in the room. Melee them and use the lift to get down to the War Room.
In the War Room, as soon as reach the bottom of the stairs, turn right to find a small box on the wall between the Cola perk machine and the ICR-7 wall buying location. Check the wall as it will have some keys. Interact with this box and you will get a key. Go back up using the lift and access the Main Office.
Enter the Main Office and you will see a locked drawer in the front. Interact with it to get a picture with four-digit code. Write down this code and check the map. Try to remember the map as well. For the next step, if you have activated the power than this skip this step otherwise head down to the Laboratories and turn on the power.
Once the power is on, go the Teleporter 3 located next to the Weapon Testing room and look for a window here that can be barricaded. If you look inside the room, you will see a big metal container with ‘Attention’ written on it in yellow. Throw a Frag or an Acid grenade inside this window. Wraith Fire will not work.
Once done, you will see a picture appear on the right side of this window. If nothing appears, try throwing again until it appears. It will show you another code. Write down this code as well. Now you need to head back to War Room and initiate DEFCON 5. The process is already explained above in the Pack-a-Punch section.
Once done, go to the teleporter in the War Room and get to the Panic Room. Once there, you will need to interact with the TV on the left wall. This is the one that is flickering. This will reveal you your third code. Write it down. For the fourth code, you will need an explosive weapon.
You can use your Welling Pistol in the Pack-a-Punch machine to make it explosive. Head to the Deserted Hallway on the top most floor where you will see four pictures of former US presidents. You need to shoot these pictures in a certain order to get the fourth code. You can try two of the following order which seem to work.
1 – George Washington (First Picture)
2 – Alexander Hamilton (Second Picture)
3 – Benjamin Franklin (Third Picture)
4 – Abraham Lincoln (Fourth Picture)
Or you can try the following one.
1 – Benjamin Franklin (Third Picture)
2 – Abraham Lincoln (Fourth Picture)
3 – Alexander Hamilton (Second Picture)
4 – Benjamin Franklin (Third Picture)
Once the correct format is done, you will get the fourth code in place of George Washington’s picture. Now that you have your all four codes, head down to the Lower Level of War Room and find the big panel in the middle of the room to enter your four codes. The order in which you must enter your code is below.
1- George Washington’s Code
2- Main Office Code
3 – Weapons Testing Window Code
4 – TV Code
Enter your codes in this order on the panel and it will accept if the order and the codes were correct. This can be checked by the announcement of Project Skadi being retrieved. The monitor will display a similar message. Now you need to head to Area 51 and survive for three waves here. Do not leave the area. Once the third wave is over, you will get the Project Skadi which is basically the Winter’s Howl weapon.
We are adding more to this guide so keep checking back for more information added to the guide.
For more Call of Duty: Black Ops 4 Zombies map guides, check out our Call of Duty: Black Ops 4 Zombies Voyage of Despair Guide, Blood of the Dead Guide and IX Guide.
This concludes our Call of Duty Black Ops 4 Zombies Classified Map Guide. If you want to add anything to this guide, feel free to use the comments section below.


