Cyberpunk 2077 offers a vast and huge Night City for you to explore and travel around. While the map is not that big when compared to CD Projekt Red’s previous release, the world certainly has multiple layers making it even bigger when you consider all layers of a single location. This makes traveling even more difficult in the game because a single location has multiple floors and areas for you to explore. For this purpose, sometimes, you will need to simply use the fast travel mechanic in the game. This Cyberpunk 2077 Fast Travel Guide explains just how you can do that in the game.
Fast Travel Guide – Cyberpunk 2077
Our Cyberpunk 2077 Fast Travel Guide details everything that you need to know about fast travel in Cyberpunk 2077.
How to Fast Travel in Cyberpunk 2077
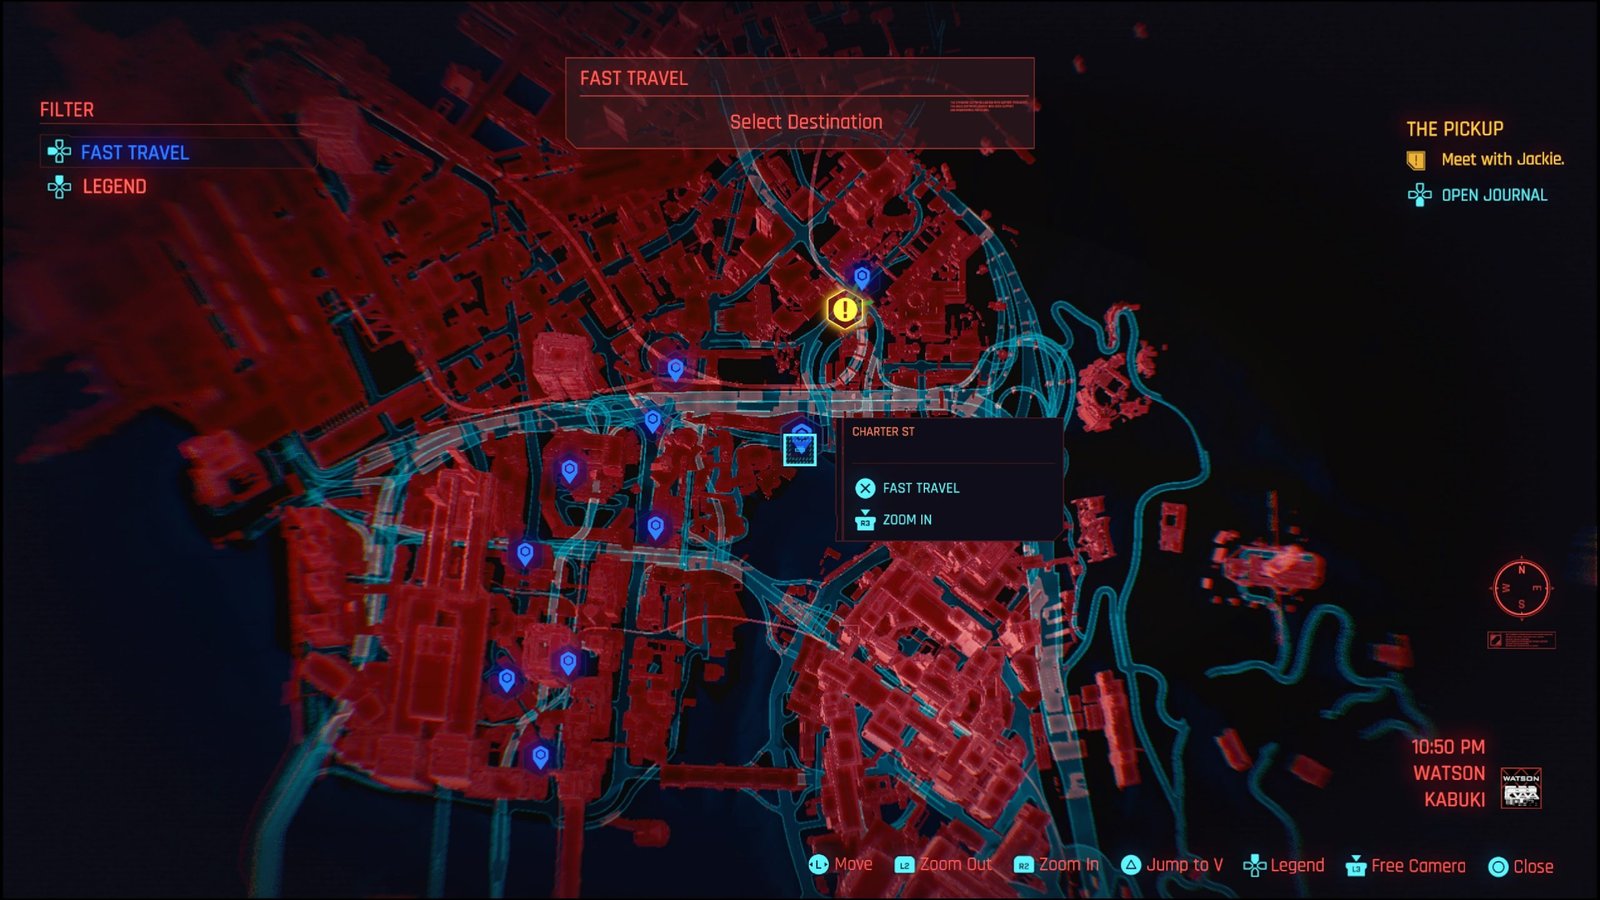
Fast traveling is really simple in Cyberpunk 2077 however you must first travel to a fast travel point located around the map in each area. These fast travel markers are small blue location icons that you normally see in maps. We have shown them in the picture below.
To fast travel, you need to head to these locations and once you’ve arrived there, you will find the fast travel terminal. Interact with the terminal and it will open the map with all the locations of your unlocked terminals on the map. Choose the terminal closest to your desired location and simply select it to travel there. The fast travel terminals are unlocked automatically once you have access to a newer section of the map so do not worry if they are not showing up right from the start. It is because those areas are still locked for you.
That is all for our guide. If you want more help with the game, make sure that you check out our Cyberpunk 2077 wiki.
This concludes our guide. If you want to add anything to this guide, feel free to use the comments section below.


