In this Shadow of the Tomb Raider Puzzles Guide, we will guide you on how you can clear different puzzles that you will encounter while playing the main story of the game. Tomb Raider franchise is famous for giving us some of the best mind tickling puzzles ever featured in video games and Shadow of the Tomb Raider features some such puzzles as well which will have you running around in circles trying to figure out what to do.
To make things easier, we have curated this Shadow of the Tomb Raider Puzzles Guide for you in which we have detailed how you can easily solve all the puzzles without much trouble. Solving these puzzles is vital as you will not be able to progress in the main story of the game without solving all these puzzles.
Puzzles Guide – Shadow of the Tomb Raider
Our Shadow of the Tomb Raider Puzzles Guide details all the puzzles and their solutions below.
Puzzle # 1 – Cart & Bell

You will encounter this puzzle on the mission ‘Hunter’s Moon’ while in Cozumel. You are required to reach the top of the Pyramid by first pushing a cart and then using it break some rubble to free a bell.
Start with pushing the cart to the middle platform of the area. Now head to the crank ahead and use it to rotate the platform. Keep rotating until the crank starts facing the cart’s rope arrow grip. Connect the crank and the right beam with a rope unless it is not automatically done.
Now connect the crank to the cart using a rope and pull the cart all the way up the hill. Once you reach the top, cut the rope and allow the cart to smash into the rubble. This will break free all the rubble and the bell will be released. This will solve the puzzle.
Puzzle # 2 – Puzzle on the Bridge

You will encounter this puzzle on the bridge while exploring the Perivian Jungle during the mission ‘Rough Landing’. You will be on your way to Kuwaq Yaku when you will come across this puzzle.
Head to the top of the stone platform to find the crank there. This is right in front of the bridge. With Jonah’s help, pull the lever until Jonah fails to do so. Try it again and roped part of the bridge will move.
After doing so, quickly run to the bottom right side and reach the water. Jonah will hold the water bucket for some time before releasing it so quickly tie it using a rope arrow with the other end of the bridge. When Jonah releases the bucket, the bridge will be raised and the puzzle will be solved.
Puzzle # 3 – Chessboard and Globe
This is a throwback to years when Lara was young and in Croft Manor. You will encounter this puzzle while trying to find the White Queen during the mission Brave Adventurer.
To solve the puzzle, start with rotating the globe to 30 degrees N and90 degrees E. Once done, a ladder will appear. Go up the ladder and interact with the crank to open the bat’s wings. It will allow 2 beams of red light to shine down on the chessboard. Now you must move the chest pieces with red shields under these lights.
If other pieces are in the way, they can be moved out of the way easily. Once both pieces are in place, the White Queen will be revealed. Interact with the globe and rotate it around so that the light goes away. Push the White Queen between the two red knights to open a secret door and solve the puzzle.
Puzzle # 4 – Lava Room
You will encounter this puzzle in Kuwaq Yaku while exploring the Trinity excavation site during ‘Path of the Living’.
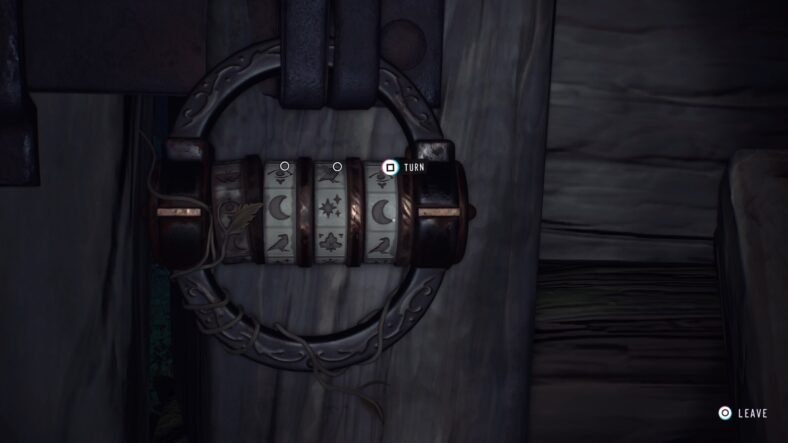
To start solving the puzzle, head to left pillar to solve it first. Its solution is Eye, Eye, Eye, and Eye. Now head to the right pillar and solve it. Its solution is 1 Dot, 3 Dots, 1 Line and 2 Dots with Line.
After each of these, you must open a new door starting with the doors on the left and right and middle in the last. Rings will appear at the bottom of the floor where the above codes must be entered. These codes are written on the walls around you.
Puzzle # 5 – Spider and Eagle Trials
You will encounter this puzzle while completing the main mission ‘Path to the Hidden City’. It is easily visible as the area is the Trial of the Eagle. You will first need to complete the Trial of the Spider and then Trial of the Eagle.
For the first part, climb up the wall where the spider logo is located above the wall. Keep climbing on the path until you reach the top. From here, rappel down and swing to the spider logo and grab the ledge.
For the Trial of the Eagle, keep climbing the tower until you get to the top and connect it with different points to rotate it. Start by climbing on the right side using the broken wooden planks. Reach the top and use points to connect the tower to make it spin. This will solve the puzzle.
Puzzle # 6 – Trial of the Serpent
You will come across this tricky puzzle in Head of the Serpent while on the ‘The Hidden City’ mission. This puzzle comprises of two different rooms. For the first room, you will be required to burn down the rubble to advance to the next room.
This bit is easy and all you need to do is use the lever in the middle of the room and then pull the wooden beam on the left side. This will cause it to release some oil leading to the rubble. Use fire arrows to ignite it and burn down the rubble to proceed to the real challenge.
In the next room, you must spin two disks so that oil can flow to the barricade and you can ignite it. If you look at the floor, you will see two disks and little oil rills. The disks must be aligned with these rills. Start by tethering both disks together and then turn the upper disk counter-clockwise until the two click are heard.
Check the floor to see if the second disk is aligned with the rill or not. It should be aligned with the rill so now all you need to do is cut the rope and align the other one with the rills. Head up and pull the serpent level and use a rope arrow to pull down the rope beam located on the right side of the lever. Oil will start to flow to the barricade. You know the drill for the next part. This will solve the puzzle.
Puzzle # 7 and 8 – Water Spigots
This puzzle is located in the Eye of the Serpent mission while you are in Cenote. Your task here is to open the gate. Start by tethering the middle spigot to the crank and move it to the right side. Jump on it and reach the top spigot.
Using your pickaxe, remove all rubble and kill all enemies that spawn. Now tether the top spigot to the crank and move it so that the water reaches the middle spigot. Now aim for the middle spigot and tether it to the crank. Move it until the water reaches the bottom spigot.
Repeat the process for the bottom spigot and the water will reach the water wheel. Now for the other puzzle up ahead which is identical to this one. Move ahead until you reach the next puzzle. Start by tethering the left spigot to the crank and move it to allow the water to enter the pool.
Once the pool is full, jump inside and reach the rubble blocking the next spigot. Destroy the rubble and kill all enemies that spawn here. Now use the crank and move the left spigot to allow the water to flow to the last spigot. Use the last spigot to allow the water to reach the water wheel and this puzzle will be solved.
Puzzle # 9 – Crypt Entrance in Church
You will be required to find the entrance to the hidden crypt during the ‘Via Veritas’ mission in Mission of San Juan. It is actually pretty easy for you to find the entrance. Start by examining the crumbling wall on the right side on the ground floor. Use your pickaxe to break it and reveal te image behind it.
Now go and examine the big yellow heron image located near the stairs. Interact with it once you find it. Now make your way to the top floor and check the crumbling wall right above the first crumbling wall that you opened using the pickaxe.
After Lara comments about the biblical quotes, head back down and look at the heron picture. Now examine the crucifixion picture located in the opposite side and then use your pickaxe on it. This will reveal the entrance to the crypt.
Puzzle # 10 – Light Beam Puzzle
You will come across this Light Beam Puzzle while playing the Via Crucis mission in Mission of San Juan. You will be following the Stations of the Cross when you will come across this puzzle.
This is a simple puzzle. Start by pulling the car to the left side and allow the holy cross to reflect the light beam. Use the crank to point the light on the middle window. Use the lever to unlock yet another beam of light.
Now, pull the car to the right side where the new beam of light is present. Get on the crank and this time, shine the light on the left window. Push the lever to trigger a cutscene and solve the puzzle.
For more Shadow of the Tomb Raider Guides, check out our Shadow of the Tomb Raider Challenge Tombs Guide and Side Missions Guide.
This concludes our Shadow of the Tomb Raider Puzzles Guide. If you want to add anything to this guide, feel free to use the comments section below.


