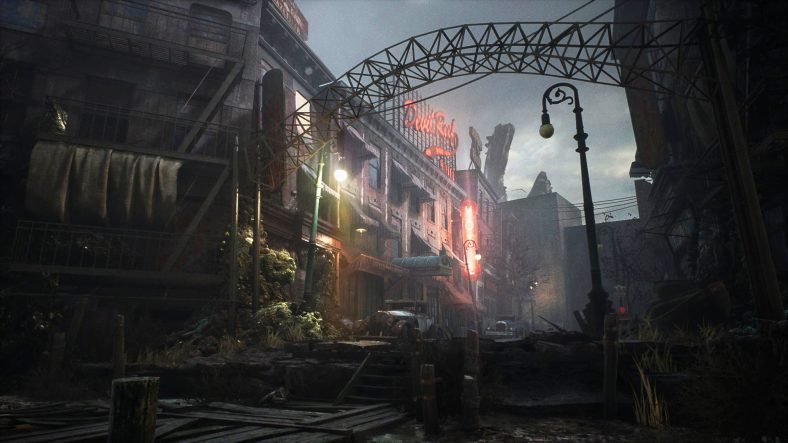
In this The Sinking City Side Cases Guide, we will guide you on how you can find and complete all side cases in The Sinking City. As you explore the city of Oakmont, you will come across many desperate citizens who have problems of their own. You can try and help them out by taking on these smaller side cases and solving them for them. These side cases are an excellent source of exploring Oakmont City and getting to know more about the happenings in the city.
They are also an excellent source of collecting some rewards, supplies and more importantly experiences which will ultimately grant you with Knowledge Points which can be used to purchase different skills in the game. We have curated this The Sinking City Side Cases Guide in which we will detail all of the side cases in the game and how you can complete them. On and off we will also share some support images that will further help you with the cases.
Side Cases Guide – The Sinking City
Our The Sinking City Side Cases Guide details everything that you need to know about side cases in The Sinking City and how you can solve them.
Letters from Oakmont
Letters from Oakmont is the very first side case that you can get in The Sinking City. You will get it from the hotel owner after you wake up in Devil’s Reef Hotel. Since this side case is pretty extensive, we have a dedicated article for this side case. Check it out for details on how to solve this side case.
Bounty of the Sea (Unlock Fisherman Costume)
You will get this side case from Vincent who is located on Deepshore Rd in Oakmont City Port. His location is marked on the map below.
Vincent will ask you to find and investigate The Pride barge. He will give you the initial information of where you can find the ship and the captain of this barge. To start the case, head to the barge which can be found at the intersection of Moorland Rd, Benevolent Tides Rd, and Old Colony St. You will need a boat to reach it. Once you have located the barge, get on it and inspect the barrels and the journal sitting on the table.
Now go back to Vincent where you can choose to find the remaining two ships or not. If you decide to find them both, your next targets are The Red Queen and Skylark. For Skylark, head to east Grimhaven Bay on Wharf Street between Tower St and Clambay St. Here. When you find the cargo boxes with the name Skylark on them, look for the crashed ship ahead in the waters. Kill the enemies here and collect the journal of the ship.
For The Red Queen, you must go to the Asylum located in Coverside. The location of the crash is east of the Asylum and north from the intersection of Seaside St and Providence Ave. The ship can be easily seen from the beach. Look for a table next to the ship where the journal is sitting. Kill the Wylebeasts that appear here and collect the journal. Return both of them back to Vincent who will reward you with bullets and Fisherman outfit.
Field Research (Unlock Bestiary Entries for Wylebeasts)
Field Research is also one of the side quests in The Sinking City. You will get this quest from Dr. Grant who is located in the Oakmont City Hospital in Coverside. To begin the side quest, you must agree on helping him in some detective work. This side case has two parts and during these parts, you will be visiting different locations so that you can collect some information on Wylebeasts and bring them back to Dr. Grant.
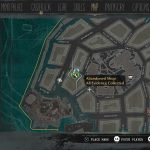
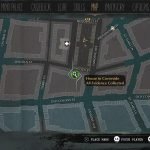
The first phase of the side case will task you with gathering information from a Former Patient’s Shop and the Infected Man’s Residence. Their locations are marked on the maps below.
Start by heading to the Former Patient’s Shop. Enter the building and kill the Wylebeasts inside. Now you must investigate five clues which are the suicide note in the basement, a letter from the hospital, shopkeeper’s note, drugs on the counter and traces of blood behind the counter on a makeshift bed. This will give you enough information to clear this section of the side case.
Now head to the Infected Man’s Residence. Enter the building and start investigating. You need to investigate the note near the bed, food on the kitchen table, rocking horse, a sample of the ooze from the upper floor and vision on the bed using Mind’s Eye. This will allow you to enter Retrocognition and figure out what happened. The correct sequence of the crime scene is
Monster near the bed>Dinner Quarrel>Entire family getting infected
Once done, return to Dr. Grant for the next phase. He will now task you with exploring an Abandoned Shop and a Restaurant of Bad Reputation. The locations are marked on the map below.
Start with the shop. Enter the shop but watch out. There is a huge monster inside and it will come up from the basement to attack you. Use the shotgun and grenades to kill it quickly and then you are free to explore the area to find clues. Inspect the letter on the counter, book in the basement, sample of the green goo and some rags next to the stairs. This will allow you to enter the retrocognition and figure out what happened. The correct sequence for the case is
People entering with the bodies>People dropping bodies>Wylebeast being created in the basement
Now your last stop is the Restaurant with a bad reputation. It is located in Eastern Reed Heights on Willow Ln between Herald St and Bullock St. Once on the Willow St, look for the building with the red canopy out front. This is your restaurant. Inside, inspect newspapers, letter on the counter, hammer and more newspapers on the first floor. Nw head towards the basement but since the doors are locked, you must use the small hole in the lower floor behind the counter.
Kill the armed man ahead and check out the clues here. Inspect bathtub, recipe near the bodies, journal on the desk, use Mind’s Eye on the skull in the bowl and the knife sitting on the table. This will complete your investigation. Go back to Dr. Grant and finish the side case by picking any choice that you want. The rewards and outcome remain pretty much the same for both choices.
Open House (Unlock Vyshyvanka Costume)
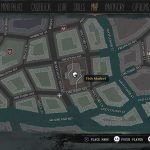
Open House is given to you by an Innsmouther in the Fish Market. The side case giver, who deals in real estate, will ask you to place incense that drives away Wylebeasts in three houses located around Oakmont City. However, he also demands that you take a picture of the incense bowl to show him as proof. Each of the three houses will have Wylebeasts in them so you must have plenty of ammo before going to these houses.
The first house is marked on the map below. Head inside and place the incense in the bowl on the first floor. Kill the enemies or simply flee after taking the pictures. The second building is located in Salvation Harbor. In the west, you will find Seven Oaks St which is between Eel St and Castle St. You will need a boat for this one. Inside, you will find many incense bowls. Place the incense in any and take a picture. Afterward, fight or flee.
If you decide to stick around, you can examine two letters and a journal inside this building. You will find the last house in The Shells. This one is located inside an Infested Site between Shine St and Warren Rd. The house is located on hawking Lane. You must have plenty of ammo or some very good enemy evasive skills to do this. The incense bowl is on the upper floor and do not forget to take a picture of the house afterward. You can also investigate a note and a postcard in this house.
Once done, return to the Fish Market who gave you the side case and turn in. You will unlock a brand new costume Vyshyvanka for completing this side quest.
A Delicate Matter
A Delicate Matter is given to you by Mr. Robert Throgmorton in Throgmorton Mansion. You will be able to get this side case from him after you have completed the main case Lost at Sea. Speak with him at his manor and he will inform you about this side case. In this case, you are required to find out what has happened to one of his associates Herbert Glover who failed to show at a recent meeting.
Pin the evidence of this residence and head to the Goldbridge Road in Oldgrove. You will find his house near the intersection of Windhalf Ave on the right side. Look for the sign at the door. Enter the house and start investigating the ground floor. Check the old newspaper near the fireplace and some envelopes. There’s a locked door here which can be opened by bringing the statue’s head from the basement. There are some supplies inside this room.
Once you are done on the ground floor, you must head to the first floor where the crime scene is located. You will find the body of Mr. Herbert right after the stairs to start with examining his body. Go ahead inside the hallway and check the empty mirror space, painting and the crumpled paper on the dresser. Now go in the next room and the open safe, broken mirror glass and then use your Mind’s Eye on the desk to find another clue.
This will open the blue portal to enter the portal and use your Retrocognition to see the three crime scene events. After inspecting them, choose them in the following order.
Men examining the mirrir>men going to the office>murderers escaping the scene
This will show you what exactly happened and will give you the name of the killer. Your next task is to find where the killer is hiding after the murder. Go to the Police Station and use their archives. Pin the evidence The Art Collector’s Demise and then select Property Crimes in Crimes, Suspect in Subject and Oldgrove in District. This will give you the file Philip ‘Squint’ O’ Connel. You now have the address to continue your investigation.
Squint’s place is located at the corner of Moorland and Salvation Rod in Salvation Harbor on the right side of the Fast Travel point on this intersection. Enter the house and kill the Wylebeasts that attack you. Examine the ground floor where you will find some meat on the table, the letter from the morgue and then head to the sink. Break the boards and check the photo. Pick up the supplies next to the photo to unlock a trophy/achievement.
Now go upstairs where you will find a body. Examine the body and the knife. Now go towards the wall on the left side and use Mind’s Eye to make it disappear and you will find the murderer hiding behind it. Speak with him and decide his fate. Now go to the table and examine the bottle there with your Mind’s Eye. Once you have decided the murderer’s fate, head back to Throgmorton and report your findings to him. This will complete this side case and begin Through the Looking Glass side case.
Through the Looking Glass
Through the Looking Glass is given to you by Robert Throgmorton after you have completed the side case A Delicate Matter. This side case will continue the case from the previous one. After your conversation, you will get a key to Robert’s father’s office in the manor. Head inside the office and check all the relics inside. You will find some really cool stuff from expeditions that Robert’s father went on. Check them all and move to the next room and use your Mind’s Eye on the boxes to make them disappear.
Once you have examined everything in the office, go back down and speak with Robert Throgmorton to get some more info. Your next target is now the Asylum in Coverside. Once inside, you will find a receptionist. Speak with here and go down once you have the key. Before entering the room, check the bottle and the broken mirror in front of the room. Once done, use the door to enter the room. Inside the room, start with investigating the giant broken mirror in the middle of the room.
Then check the photo, some newspapers and the note. Go to the painted wall and use Mind’s Eye on it. Go outside and enter the portal to trigger your Retrocognition. Start with the sequence inside the room and go outside to set the right sequence for the crime scene. Now go back up and speak with the receptionist. Your next stop is Randall Glassworks but you must first find its exact location.
For this, you must go to the Oakmont City Hall located in Advent. Access the archives and pin the evidence Bethany’s next step. Now choose Enterprises in Subjects, 19th Century in Period and Salvation Harbor in District. This will give you the exact location of Randall Glassworks. You must head to Skipper Rd between Eel St and Calmshore St.
The door of Randall Glassworks will be marked with the sign so its pretty easy to find out. Head inside and kill the Wylebeasts. Inspect the glass samples inside and then go upstairs. Knock on the door and the people who run the place will open the door. They will tell you about the Wylebeast attack and the basement. Grab some ammo and clear the basement of all the Wylebeasts. Shoot the lock the open the door. Once the area is clear, go back up and turn in. You will get the key to the room in the basement.
Enter the locked room and start inspecting around the area. You can check the commandment, diary, chest and then use the Mind’s Eye on the broken mirror and the cabinet for more clues. Once you have enough clues, you will get some more information about the case but nothing will be enough to help you proceed with the case.
Time for some more archive hunting. Go to the Police Station and access their archives. Pin the evidence Search Warrant and choose Suspects in Subjects, Documentation in Evidence and Salvation Harbor in District. You will get the report in which the address is mentioned. The report will point you to a house located at the corner of Windhalf Ave and Goldbridge Rd. This is your next stop.
Once there, you will notice the main gate of the house is closed. Go north and enter the house from there. Enter the door and head straight to the first floor. Here, you can inspect the books and the maps. On the ground floor, you will find a newspaper and some letters. Use your Mind’s Eye on the wall next to these envelops to open the secret room and inspect the coffin inside.
Now head down the basement, where you will have to use Mind’s Eye again to get inside the secret room. Inside, you will find a coffin, a picture, and a mirror. Use Mind’s Eye on the mirror to get some more clues that will open up the portal for Retrocognition. Watch the events and then mark them in the following order.
basement>first floor>ground floor
Once done, go and break the mirror on the ground floor and then head to the basement where you will finally encounter Bethany. Now you will e required to make a decision from either letting her complete her ritual or taking the mirror without her consent. The second option will require you to kill her. Choose your decision and then head back to Robert Throgmorton to complete the case. The decision does not really matter at the end of the case.
Extra Hours ( Unlock Police Envoy Costume)
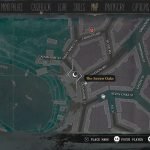
Extra Hours is given to you by Officer Shaw who is present The Seven Oaks Inn in Salvation Harbor.
Officer Shaw will ask you to find and take photos of three victims in their apartments. Officer Shaw will give you addresses of all the victims. You can complete the side case in any order you like. The location of E. Brian is located on Vinland Ave, south of University St in Reed Heights. Enter the building with the white door and make your way to the top floor where you will find a barricaded door. Destroy the barrier and enter the apartment.
Make sure you have plenty of ammo because you will need to kill the biggest Wylebeasts inside. Once done, examine the dead body, take a picture, take the membership card from the desk and head to the next victim. Next, you can check out R Bekker’s house. His house is located at Bacon Street between Century Ave and Hillside St. Enter the house by destroying the barricaded door. Inside, you will find the body hanging from the roof. Examine the body and take a picture of it. Now go to the first floor and collect the membership card. On to the last one.
The last victim is called J.R. Nelson and his location is in Salvation Harbor. You will need to get to his house via a boat which is located at Seven Oaks St between Skipper Rd and Octopus Ave. Enter the house and check the body. Some Wylebeasts will appear. Kill them, examine the body, take a picture and check the membership card sitting at the table on the first floor. Now that you have all the victims checked, head back to Officer Shaw at The Seven Oaks and turn in.
Rest in Peace (Unlock Man of Science Costume)
Rest in Peace is another side case that you can take in The Sinking City. This side case can be started at the St. Botolph’s Cemetery which is located in Reed Heights. For this side quest, you are required to find the man on the pier near the Cemetery and speak with him to begin the side case. Now start heading towards the grave and you will find the dead body lying there. Inspect the body and some Wylebeasts will attack you.
Kill the Wylebeasts and then use your Mind’s Eye to start a trail to the next grave. Once you arrive at the grave, inspect the grave, coffin, and the tombstone. Also, notice the claw marks on the coffin. Now make your way to the middle of the cemetery and inspect the note on the cart, opened coffin and the tombstone. Now inspect the last open grave and pick up the note. Afterward, inspect the blood and the grave to finish up the inspection.
Now that you have all the evidence and clues, pin the evidence ‘Plundered grave’ and make your way to the City Hall. Access the archive and choose Citizens in Subjects, 19th Century in Period and Citizen Records in Registry. This will give you an address of a house in Salvation Harbor. The house is located on Maple St between Polaris Rd and Old Church Rd. This is an infected zone so make sure that you are well prepared. Go inside the house and make your way to the first floor.
Inspect the suicide note, bottle, and the dead body. Check the house for some more supplies and once you are done, pin the evidence ‘A Book Page’ and head to the library. Access the archive there and select Restricted Section in Section, 17th-19th Century in Period and European in Region. This will give you the address of a house in Coverside. The house is located on Providence Ave between St. Elmo Ln and Victory Ln. You will need a boat for this trip.
Enter the house and go to the first floor. You will encounter two armed enemies here. Kill them and then check the dead body. Look around for some supplies and clues and then head back to Cemetery where the person is located who gave you the side case. Turn in to complete the side case and receive the Man of Science costume along with some rifle cartridges.
Assigned Reading (Unlock Master Sleuth Costume)
You can start this side case by speaking with Samuel Hopes at the Oakmont University in Reed Heights. You will find him near the fountain reading a book. Speak to him and he will ask you to find three books for him. Start with the book which is with a student in The Shells. Go to the building located at Inner Shine St between Windsweep Rd and Justice St. You will find three people inside, speak with them and then take the letter from the table.
Make your way up the stairs and destroy the lock on the door to get access to the locked door. Inside, you will find a wall with some blood stains on it. Using Mind’s Eye will reveal a room where you will find a dead body. Inspect all the clues and then enter the blue portal to use Retrocognition and inspect all three crime locations. Once done, arrange them as
Students summoning their books>Students getting killed>Exiting the room
Once done, go back to the ground floor and check the wall in the corner and use your Mind’s Eye to reveal it and get access to the back. Pick up the book and the people you spoke with earlier will attack you. Kill them and check the area for more clues and supplies. Make sure you grab the journal from the next room. Now for the second book, you must make your way to the Cemetery in Reed Heights.
Enter the building at the cemetery from the back after destroying the planks at the locked door. Start investigating by checking the letter on the table and then go up the stairs. Pick up the piece of paper from the table and go to the locked room. Shoot your way through to find a bookcase inside. Use your Mind’s Eye on it to reveal the room behind. Check the book on the wall which will make the man in the room attack you. Deal with him and leave the building.
You are now left with the last book. To find the last book, you must begin your search by first heading to the City Hall. Pin the Evidence ‘Finding the third book’ and then choose Citizens in Subjects, Occupation in Registry and Advent in District. This will give you an address of Benjamin Miller’s Residence in Advent. It is located on Carpenter St between Benevolent Tides Rd and Hawthorne Ave. You will need a boat to access this house.
Enter the building and start looking around for clues. Inspect the yellow statue on the table and use Mind’s Eye on it. Get the key and go to the next room after taking the sheet of paper from the frame. Use Mind’s Eye inside the room and then go up the stairs. Find the bloodstained wall and use the Mind’s Eye on it. This will make three Wylebeasts to attack you. Kill them and collect the book. Look around for any more clues and supplies and then head back to Samuel to turn in and collect your rewards.
Historical Heritage
This side case can be started during the Fathers and Sons main case or after completing the main case. During this case, you will visit the Redemption Church located on Marsh Avenue in Salvation Harbor. There is a board in front of the Church that you must examine. After this, you will get the side case and you will need to inspect four other locations to complete this side quest. These include:
- Fish Market – The Shells
- Oakmont University – Reed Heights
- Church of St. Michael – Advent
- Hospital of St. Mary – Coverside
You can visit them in any order to complete the side case.
We are adding more side cases to this guide and completing more at this point. Check back soon for more side cases added to this guide. In the meantime, check out more The Sinking City guides below.
This concludes our The Sinking City Side Cases Guide. If you want to add anything to this guide, feel free to use the comments section below.


